|
Build your own hummingbird feeders with everyday materials!
Here are the directions, but you can be flexible and do what works best for you.
Example: you can paint the feeder a solid color, add stripes and other details, or
leave it unpainted; you can use a drill or a heated awl; you can use Krylon plastic
paint, or just scuff the surfaces with sandpaper and use whatever paint you have
on hand. Children should have adult supervision for this craft project.
Let's look at the materials we will need.
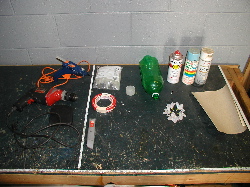
Materials:
1. (1), 1 liter pop bottle (required)
2. (1), small 1/4 fluid ounce capacity plastic cup; 1/4 US cup = 2 US fluid ounces
(required)
3. (1), eye hook (required)
4. (2 to 5) plastic flowers (optional, you can make your own out of aluminum foil)
Tools:
1. Hot glue gun & glue stick (required)
2. Pliers (optional, but much safer for holding things)
3. Drill & drill bits (optional, you can use an awl heated on your stove top)
4. Utility knife (optional, you can use an awl heated on your stove top)
Painting:
(Painting is optional except that the flowers must be red. A plastic spray can paint
such as Krylon "Fusion" will work best. However, most paints will stick
to plastic for a season if you first scuff the surface well with sandpaper)
1. Masking tape (optional, not required if you painting the feeder
a solid color)
2. Base color such as white
3. Highlight color such as light blue (optional, not required if you're painting
the feeder a solid color)
4. Apple red (for the flowers)
5. (1) sheet sand paper (anything above 80 grit will do, the type is not important)
Step 1.
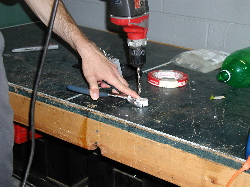 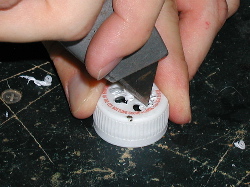
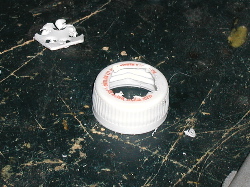
Drill several holes in the top of the pop bottle cap, then finish
cutting out the end of the cap. If you don't have a drill or utility knife, you can
heat an awl on your stove top and use it to cut the whole. Note: if you don't have
pliers, use gloves to hold the cap when drilling or using the heated awl. If the
plastic gasket that comes with the pop bottle cap comes out while cutting, cut a
hole in it and put it back into the cap. Keeping the gasket is important to get a
good seal that won't leak.
Step 2.
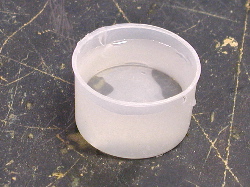
Next, take your small plastic cup and fill it with water to within
about 1/4 inch from the top. This will help the glue to float so you can attach the
cap.
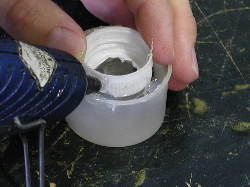 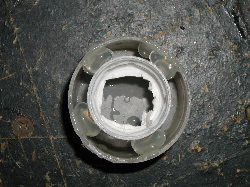 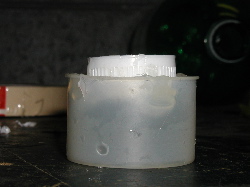
Carefully hold the cap as shown above and start adding glue to
form a bridge between the cup and the bottle cap. One important thing to remember
is that the bottom of the cap will be the lowest level of the hummingbird sugar water,
so you don't want it more than half a cap down (see above rightmost picture). Note:
use more glue than I did here, because I found that when you screw the cap onto the
bottle, it stresses the joint; just leave enough room to insert the flowers.
Step 3.
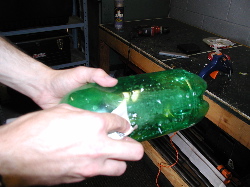
Sand the outside to remove any labels and to promote adhesion for
the paint.
Step 4.
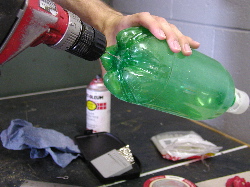 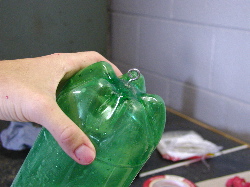
Drill a hole and screw the eye hook in. You can use a hot awl if
you don't have a drill. Make sure it's a tight fitting hole so it doesn't leak air.
Step 5.
Painting
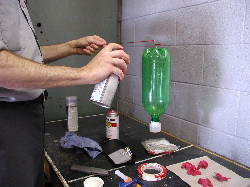 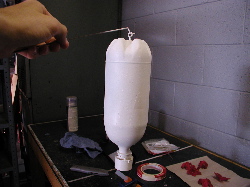
Paint the empty pop bottle a solid color; use a coat hanger or
wire to hold it as you paint.
Step 6.
Making Stripes
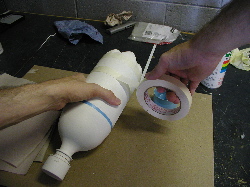
1. Wrap a line of tape around the bottle on either side of your
intended stripe.
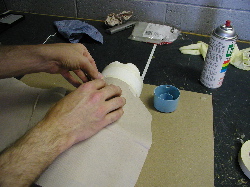
2. Tack a piece of paper onto the first line of tape.
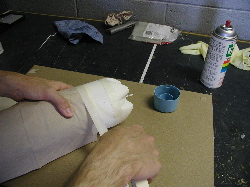
3. Put down a second line of tape to make a seal between the first line of tape and
the paper. Do this to the other side of the taped off stripe as well, so that everything
but the exposed stripe area is covered.
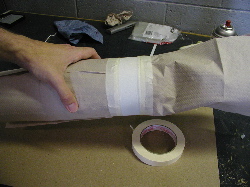 
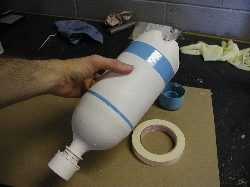
4. You now have covered everything but where the stripe will be.
Use spray paint or a brush to apply the paint. Before the paint has completely dried,
carefully remove the tape. Check you hands as you go, so you don't get paint on the
white.
Step 7.
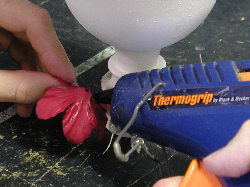 
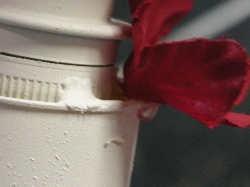
Apply the flowers with a drop of glue on the bottom and mount it
on the edge of the cup. Make sure there's a hole in the center so the hummingbird
can get it's beak down into the sugar water in the cup.
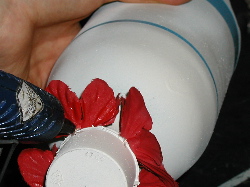
Next, reinforce the bond with more glue on the bottom. Note: I
used four flowers here, but you can make any arrangement you want so long as you
include red flowers.
Your hummingbird feeder is ready to be hung!
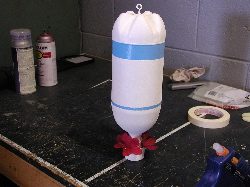 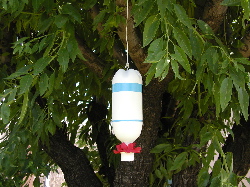
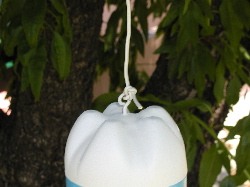
I hung the feeder in a tree with a piece of electrical wire, but
you can use anything to fasten it.
Step 8.
Try to hang your hummingbird feeder in the shade in a place you
can still see.
The nectar for hummingbirds is made by mixing 1 part regular table
sugar, with 4 parts water and heating it until it dissolves; let the sugar water
cool and pour it into the bottle using a funnel. You shouldn't make more then your
hummingbirds can drink in a week, even though the bottle can hold a lot! (See our
hummingbird food page for more information...)
Nectar must be replaced every 7 days (more often in the heat of summer). When you
do this, be sure to clean the inside of the feeder with a mild detergent and rinse
thoroughly.
Now, sit back and enjoy your new little friends!
Select a hummingbird by its name: (in alphabetical order)
Select a hummingbird's nest by its name: (in alphabetical
order)
|

![]()
![]()

![]()
![]()